Studio
FEDn Studio is a web-based tool for managing and monitoring federated learning experiments. It provides the FEDn network as a managed service, as well as a user-friendly interface for monitoring the progress of training and visualizing the results. FEDn Studio is available as a SaaS at fedn.scaleoutsystems.com . It is free for development, testing and research (one project per user, backend compute resources sized for dev/test).
Scaleout can also support users to scale up experiments and demonstrators on Studio, by granting custom resource quotas. Additonally, charts are available for self-managed deployment on-premise or in your cloud VPC (all major cloud providers). Contact the Scaleout team for more information.
Getting started
Before you can start using Studio, you will need an account. Head over to fedn.scaleoutsystems.com/signup and sign up.
Create a project
Start by creating a new project. A project can be used to organize your work. It can be shared with other users, allowing you to collaborate on experiments.
Click on the “New Project” button in the top right corner of the screen.
Continue by clicking the “Create button”. The FEDn template contains all the services necessary to start a federation.
Enter the project name (mandatory). The project description is optional.
Click the “Create” button to create the project.
Project overview
Once you have created a project, you can find it via the sidebar link Projects. Here you will find the list of all your projects. When inside a project you can see the following tabs in the sidebar:
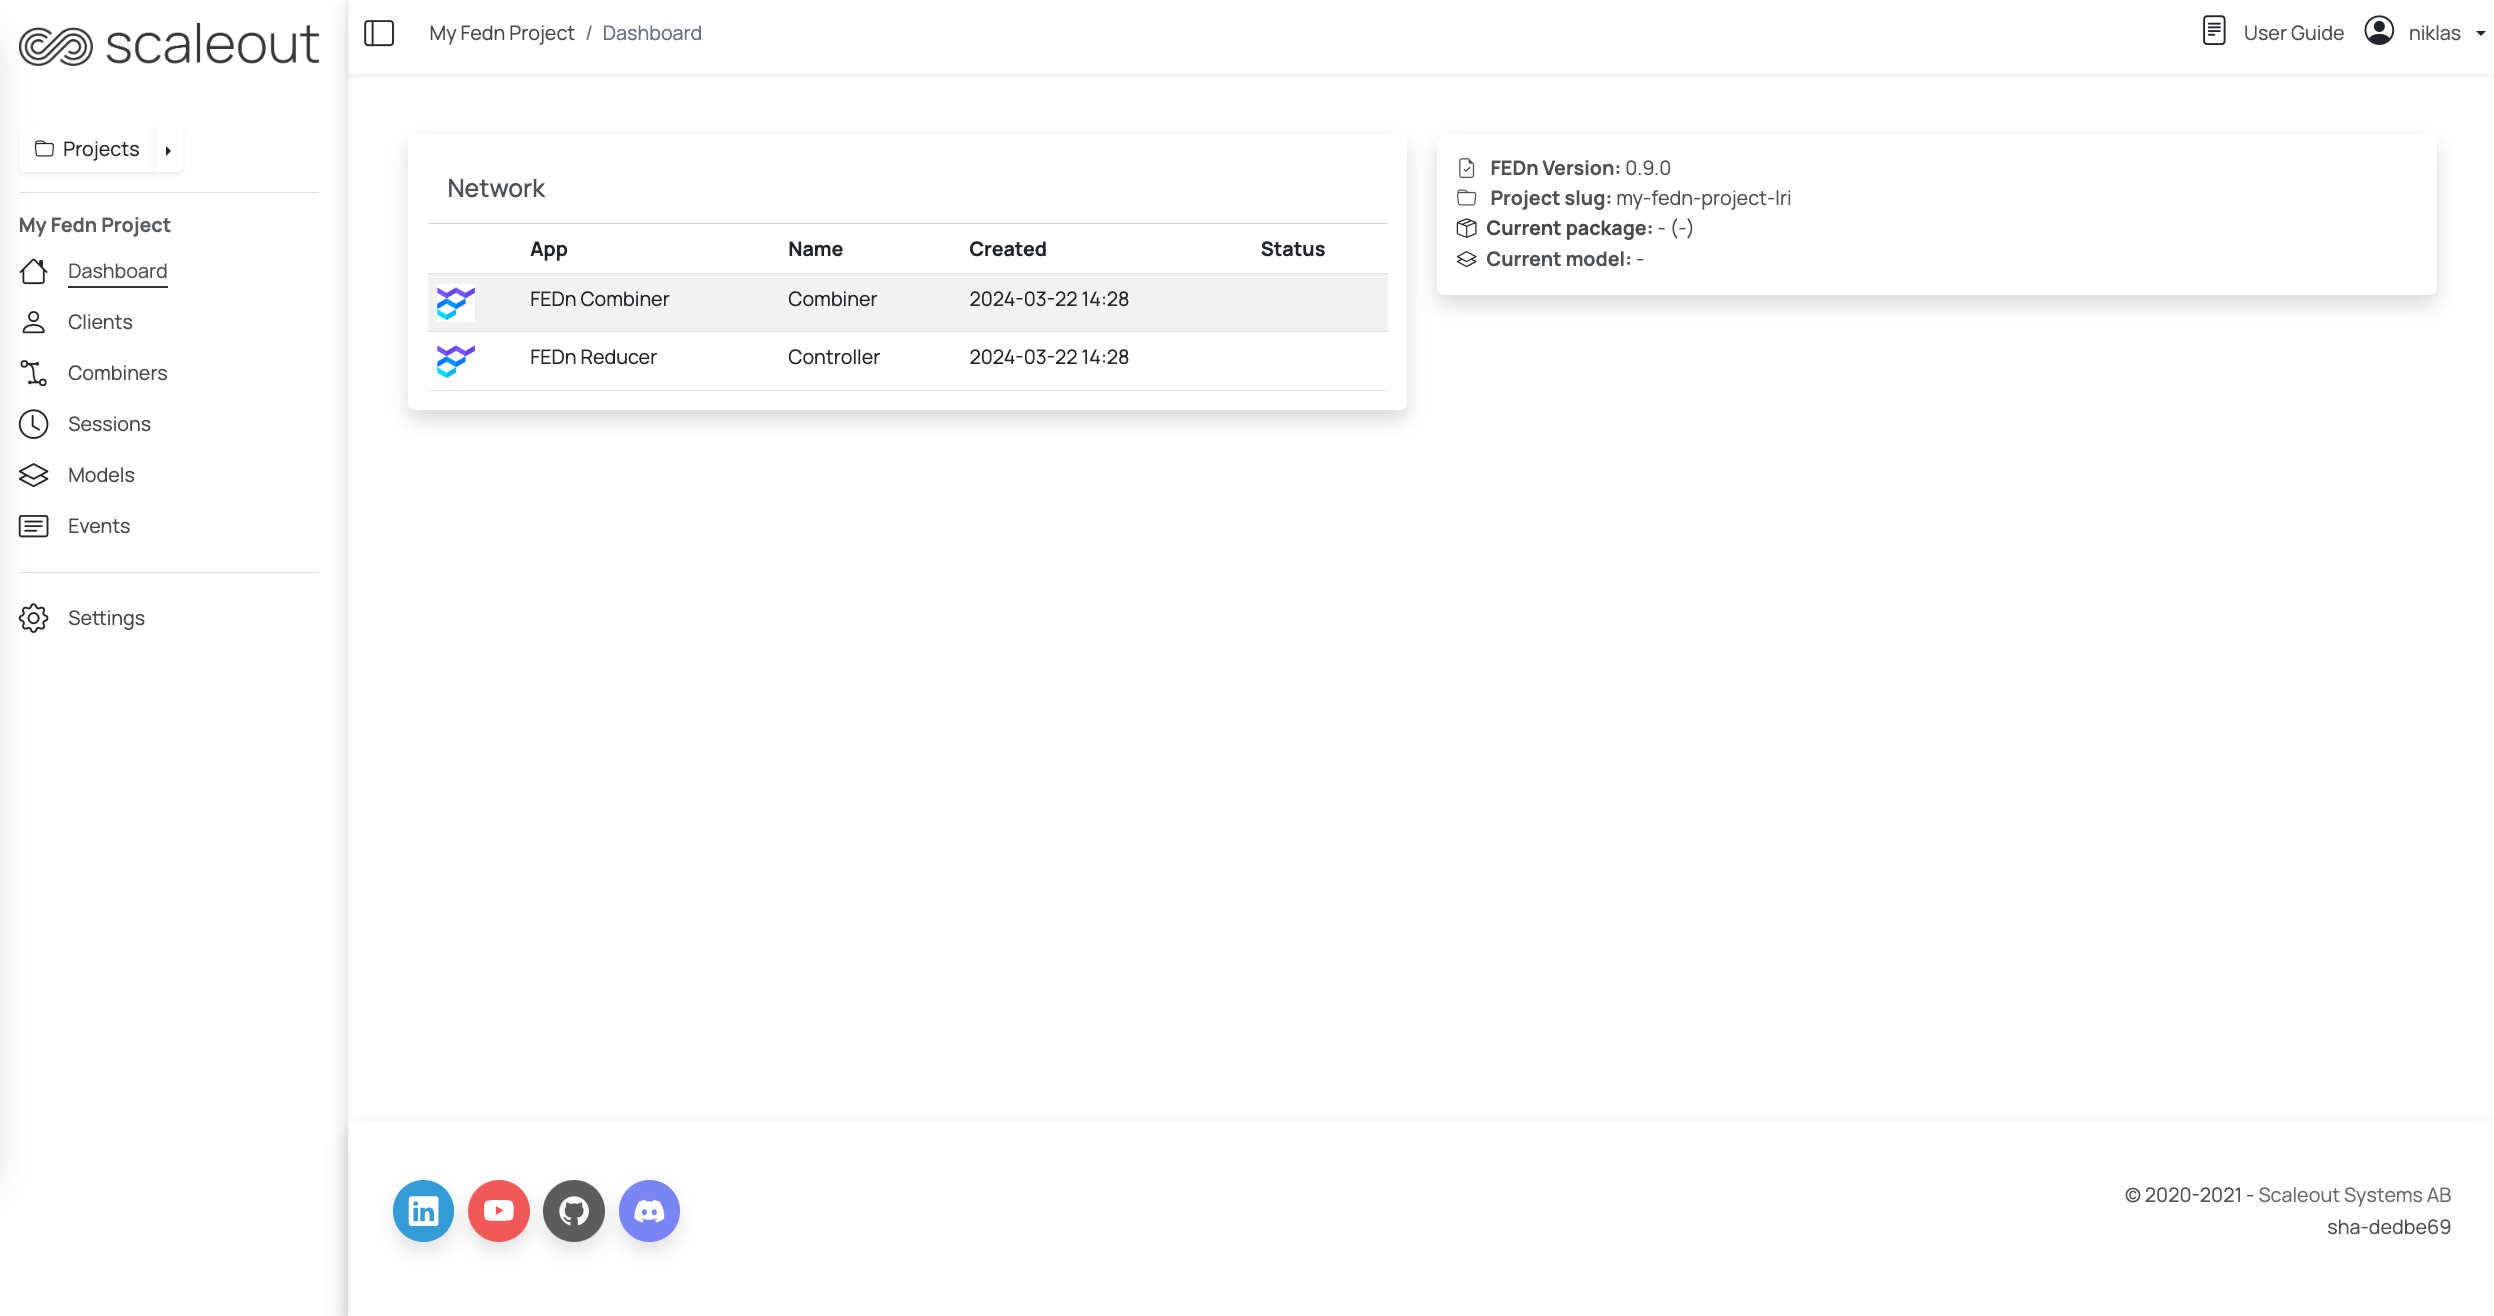
Dashboard: The dashboard provides an overview of the project. The controller and combiner(s) are listed under “Network”. This is also where you can find the current FEDn version and have the option to upgrade to a newer version if available.
Clients: management of client configurations and a list of current clients. Observe that this feature does not deploy clients, instead it configures a client config that contains a unique token which is required to connect to the reducer and the combiner.
Combiners: a list of combiners. Observe number of active clients for each combiner.
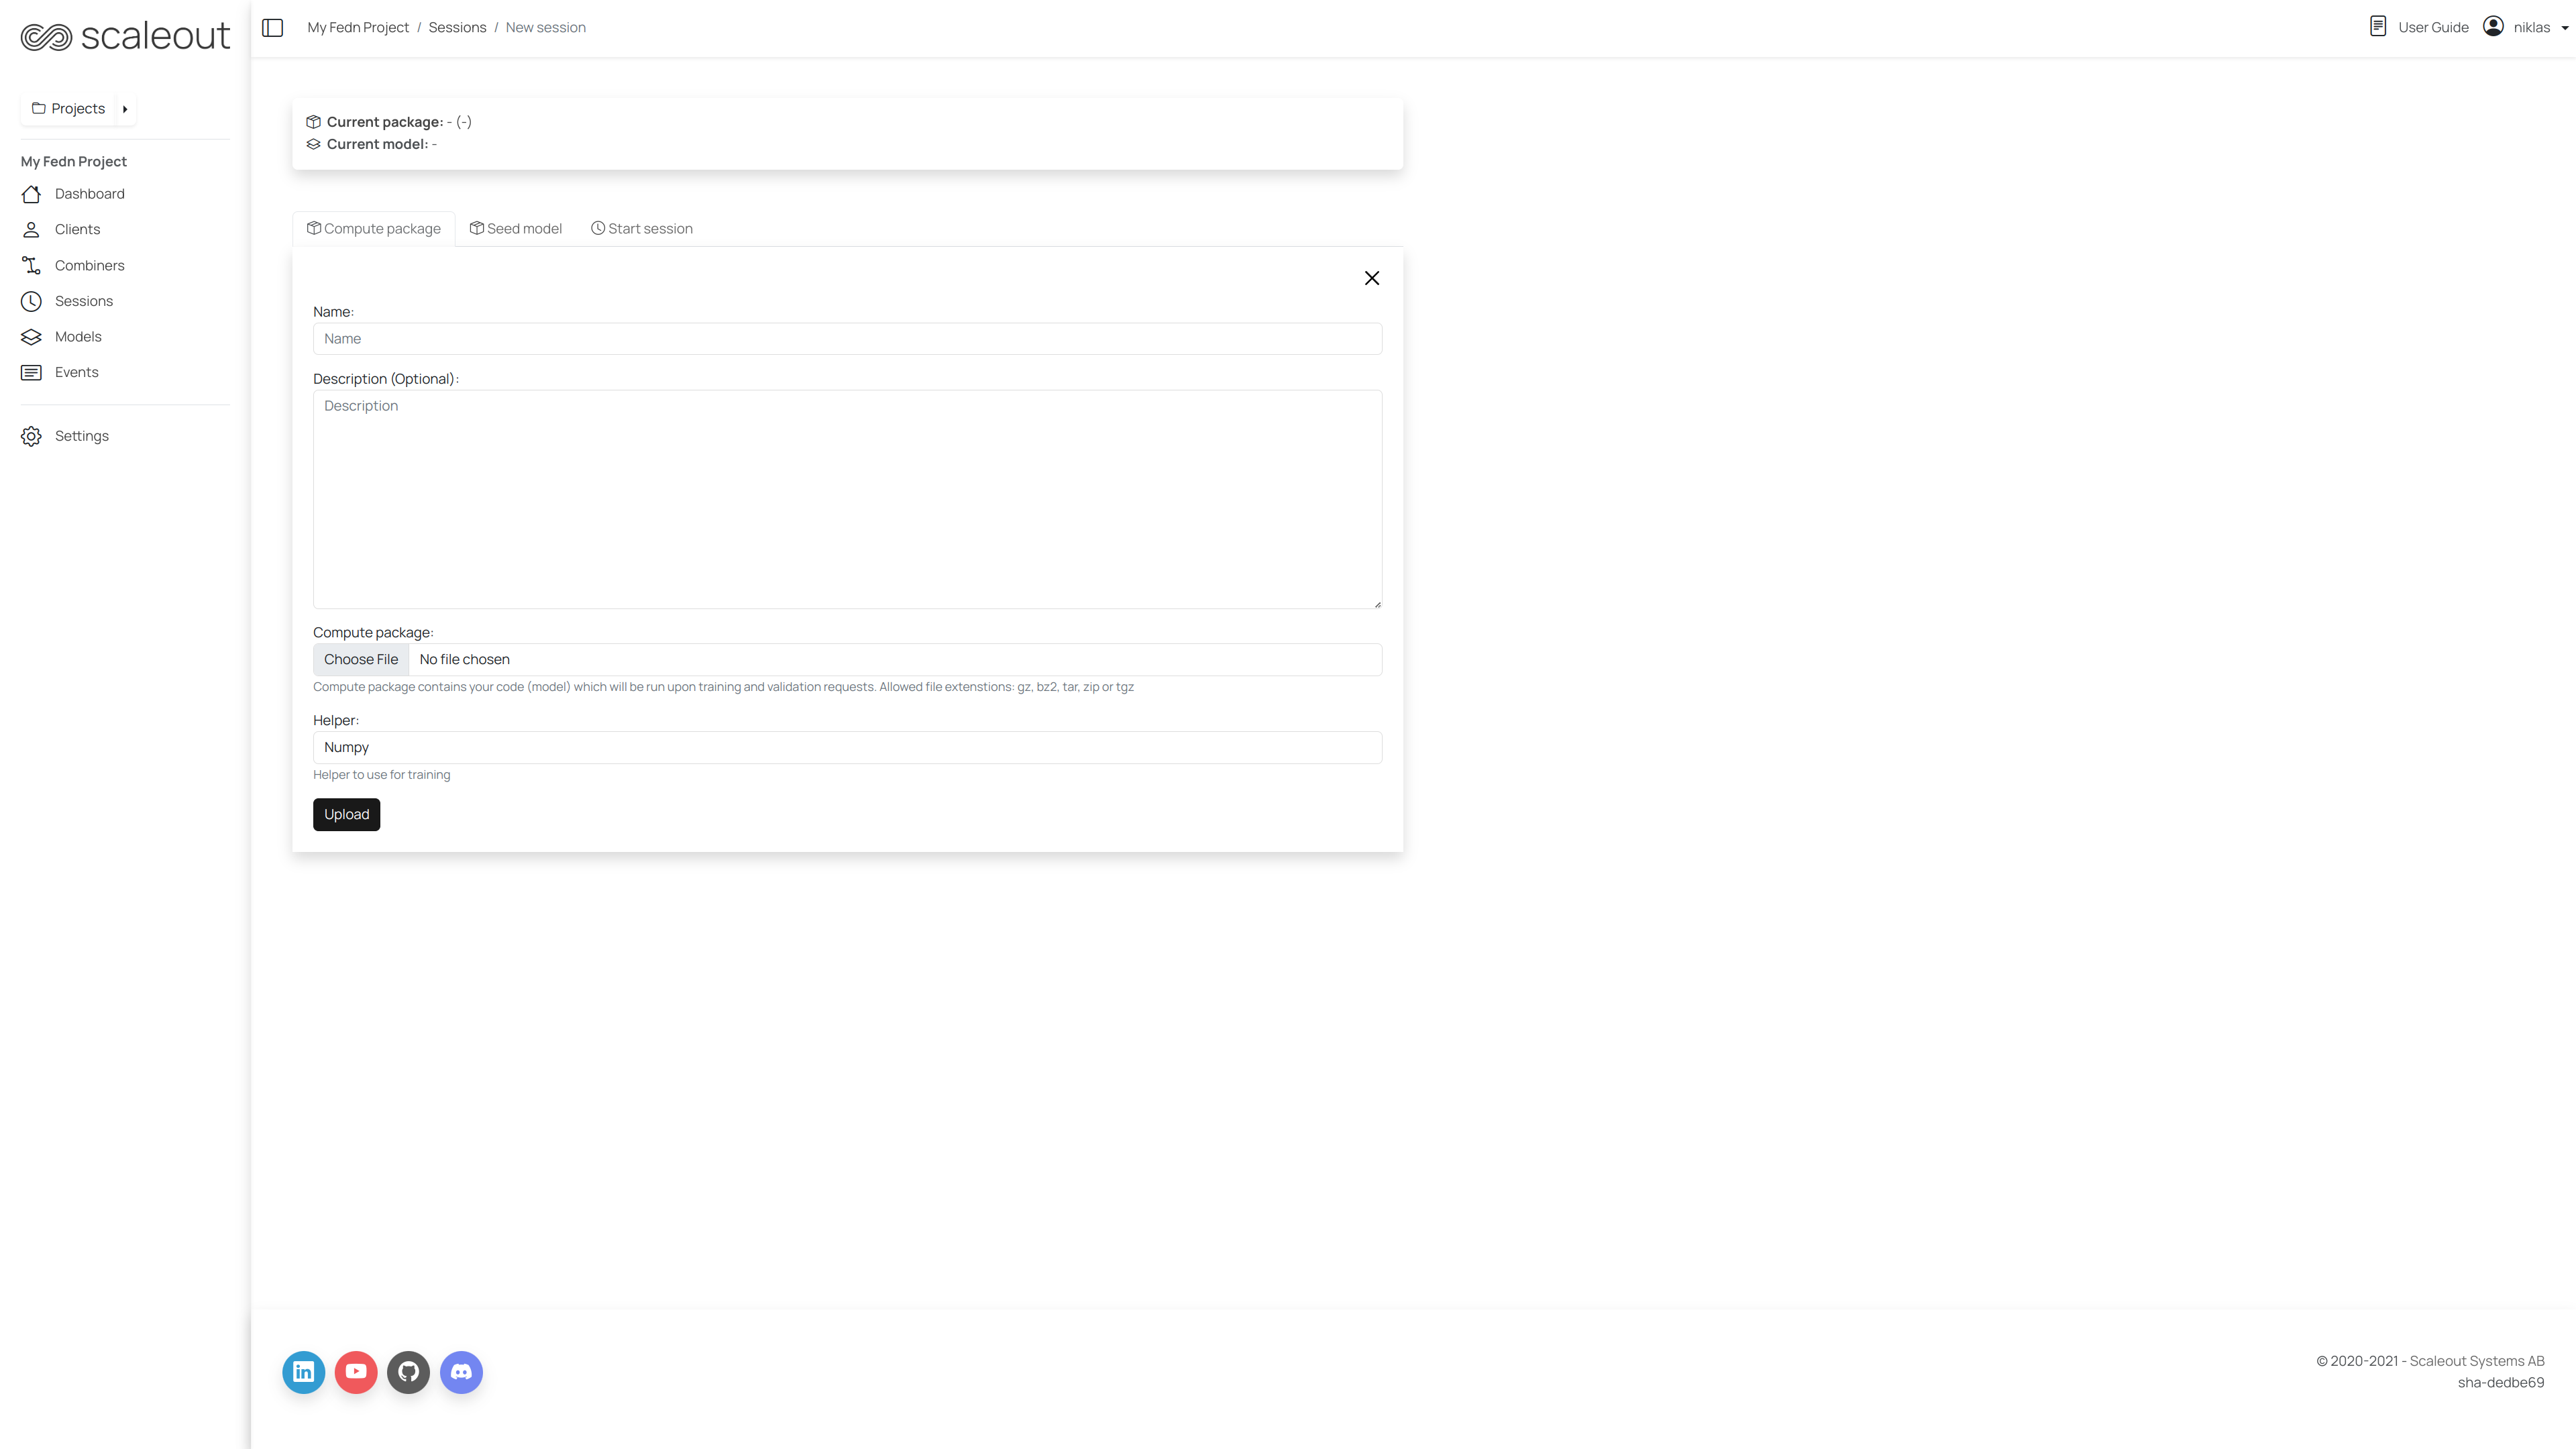
Sessions: a list of sessions with related models. Configure and start a new session. Upload compute package and seed model, set number of rounds, timeout limit etc.
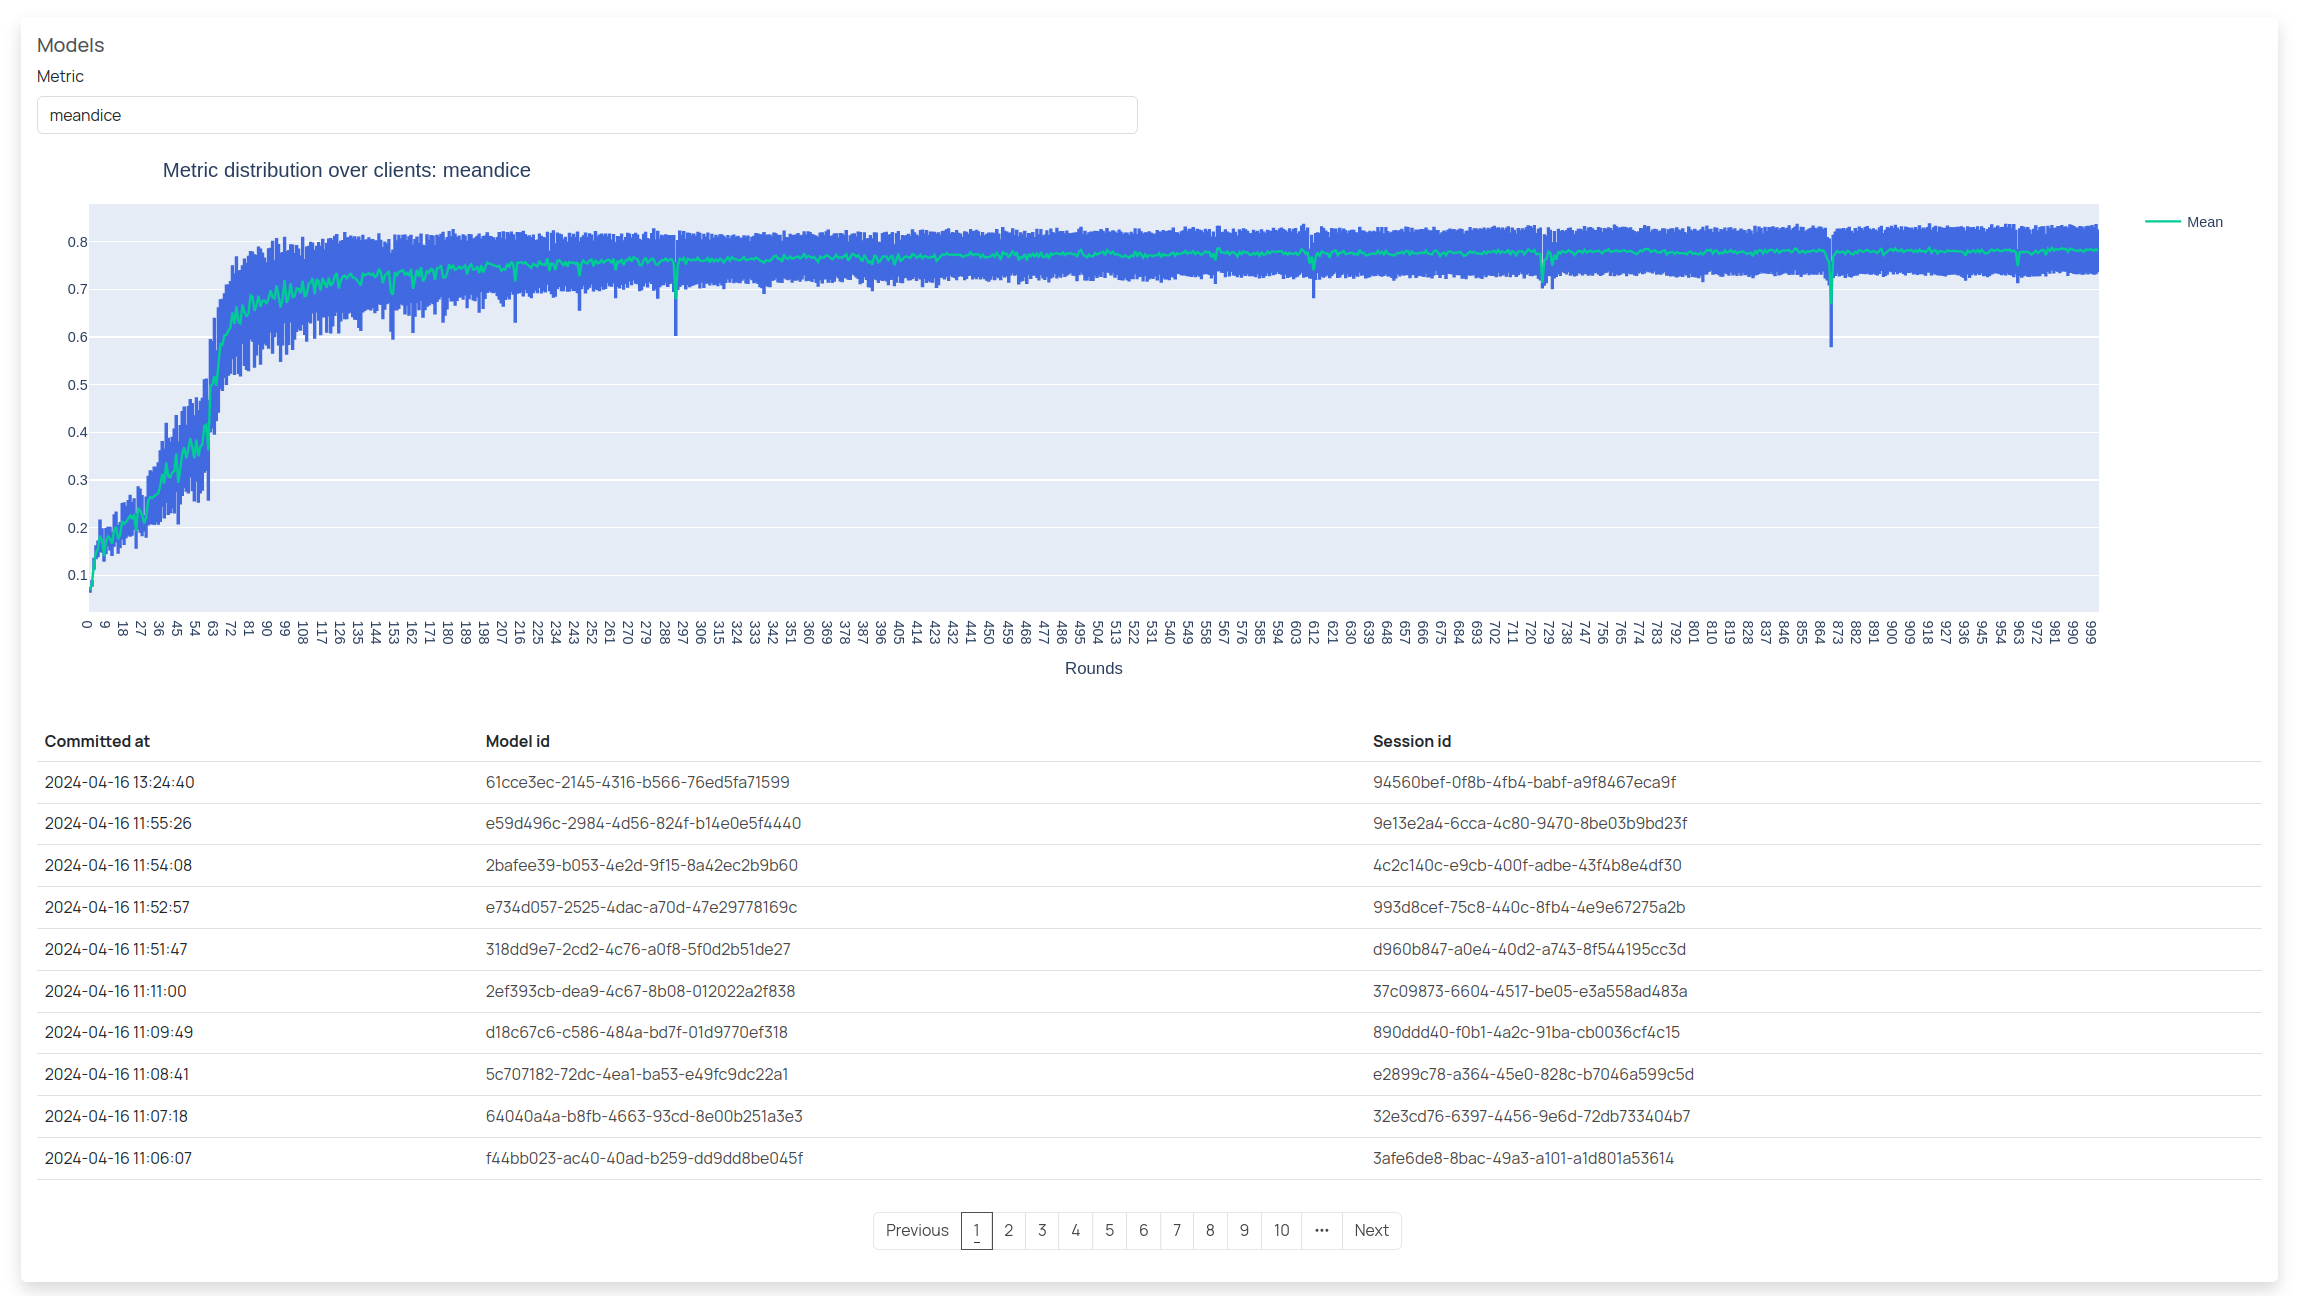
Models: a list of models generated across sessions, and dahsboards for visualizing training progress.
Events: a log of events from the combiner and the clients of the federated network.
Settings: project settings, including the option to give access to other users and to delete the project.
Package and seed model
Please see Initialize FEDn with the client code bundle and seed model for instructions on how to create a package and a seed model.
Upload files
In the Studio UI, navigate to the project you created and click on the “Sessions” tab. Click on the “New Session” button. Under the Compute package tab, select a name and upload the generated package file. Under the Seed model tab upload the generated seed file:
Connect a client
Navigate to “Clients” in the sidebar.
Click on the “Connect client” button. Follow the instructions on the site to connect the client. Alternatively, you can connect the client using a docker container by running the following command:
docker run \
  -v $PWD/client.yaml:/app/client.yaml \
  ghcr.io/scaleoutsystems/fedn/fedn:0.9.0 run client --secure=True --force-ssl -in client.yaml
If the client is successfully connected, you should see the client listed in the “Clients log” list.
Start a training session
In Studio click on the “Sessions” link, then the “New session” button in the upper right corner. Click the Start session tab and enter your desirable settings (or use default) and hit the “Start run” button. In the terminal where your are running your client you should now see some activity. When the round is completed you can see the results in the FEDn Studio UI on the “Models” page.
Watch the training progress
Once a training session is started, you can monitor the progress of the training by navigating to “Sessions” and click on the “Open” button of the active session. The session page will list the models as soon as they are generated. To get more information about a particular model, navigate to the model page by clicking the model name. From the model page you can download the model wieghts and get validation metrics.
To get an overview of how the models have evolved over time, navigate to the “Models” tab in the sidebar. Here you can see a list of all models generated across sessions along with a graph showing some metrics of how the models are performing.
Accessing the API
The FEDn Studio API is available at <controller-host>/api/v1/. The controller host can be found in the project dashboard. Further, to access the API you need an admin API token.
Nevigate to the “Settings” tab in the project and click on the “Generate token” button. Copy the token and use it to access the API. Please see fedn.network.api for how to pass the token to the APIClient.